I have recently started to work on a new project “Cloud Native Starter” where we want to build a sample polyglot microservices application with Java and Node.js on Kubernetes (Minikube) using Istio for traffic management, tracing, metrics, fault injection, fault tolerance, etc.
There a currently not many Istio examples available, the one most widely used and talked about is probably Istio’s own “Bookinfo” sample, another one I found is the Red Hat Istio tutorial. Unlike our example here, the other tutorials and examples do the request routing part not in the user-facing service directly behind the Istio ingress. It took me a full weekend to figure out how to get request routing for a user-facing service working behind an Istio ingress and with the help of @stefanprodan I finally figured it out.
We are building this sample on Minikube, instructions to set Minikube, Istio, and Kiali can be found here.
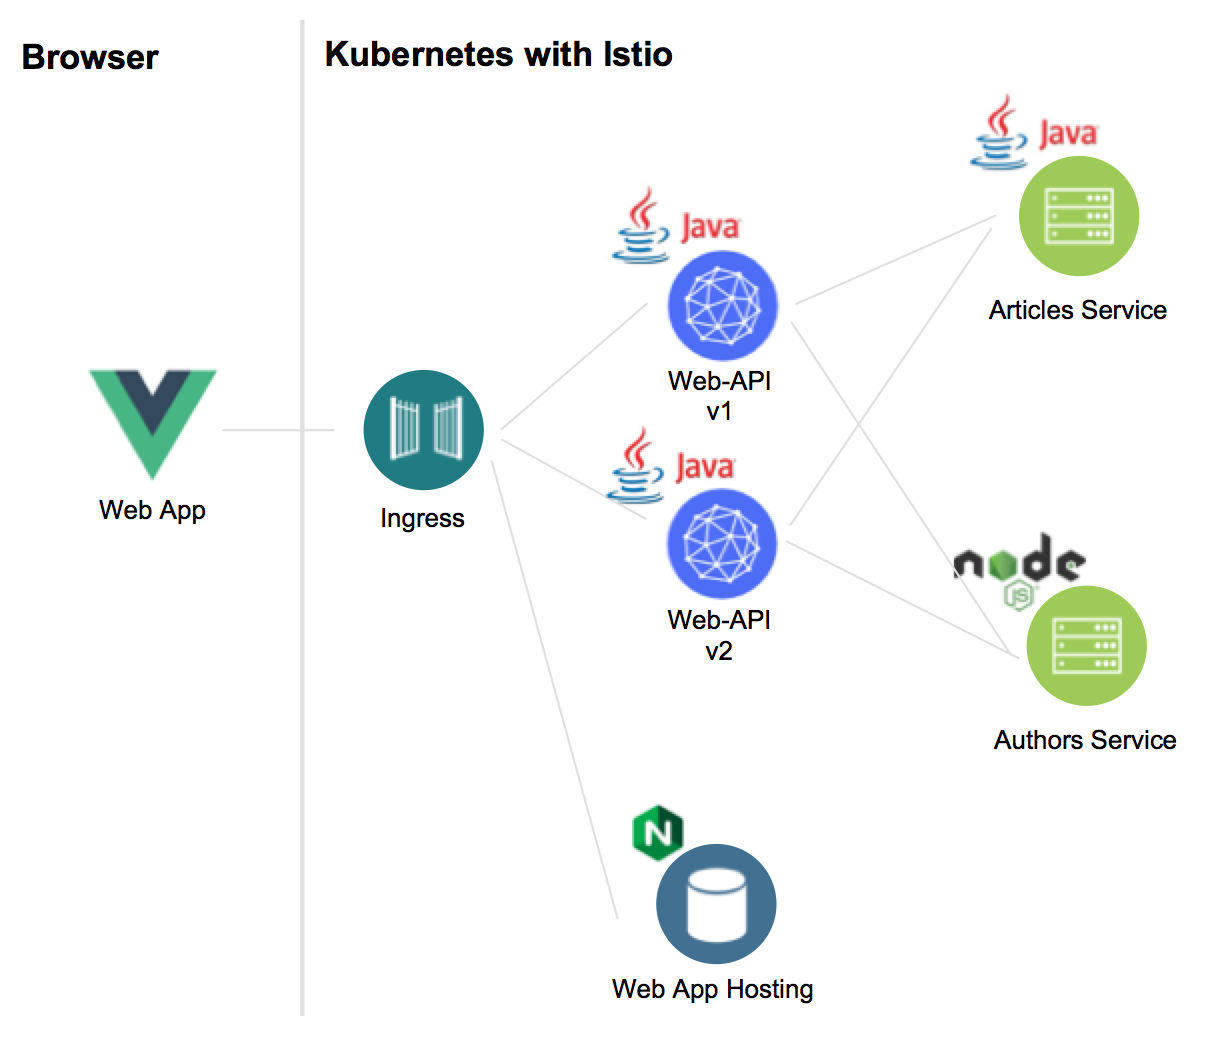
The application is made up of four services:
- Web-App Hosting is a Nginx server that provides a Vue app to the browser
- Web-API is accessed by the Vue app and provides a list of blog articles and their authors
- Articles holds the list of blog articles
- Authors holds the blog authors details (blog URL and Twitter handle)
The interesting part is that there a two versions of Web-API and these exist as two different Kubernetes deployments running in parallel:
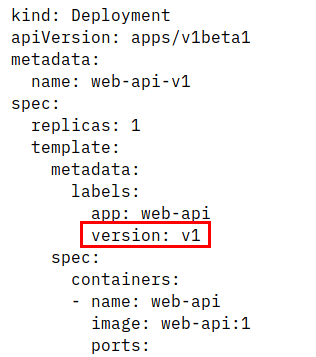
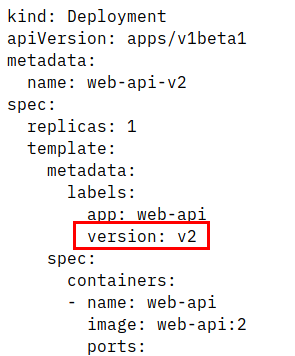
Normally, in Kubernetes you would replace v1 with v2. With Istio you can use two or more deployments of different versions of an app to do a green/blue, A/B, or canary deployment to test if v2 works as expected.
Note the “version” label: this is very important for Istio to distinguish between the two deployments. There is also a Kubernetes service definition:
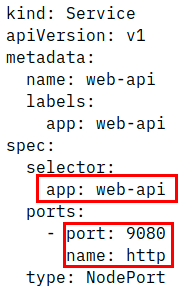
The selector is only using the “app” label. Without Istio it will distribute traffic between the two deployments evenly. Note that the port is named (“name: http”). This is a requirement for Istio.
Now comes the Istio part. Istio works with envoy proxies to control inbound and outbound traffic and to gather telemetry data of a Kubernetes pod. The envoy is injected as additional container into a pod. The envoy “sidecar” allows to add Istio’s capabilities to an application without adding code or additional libraries to your application.
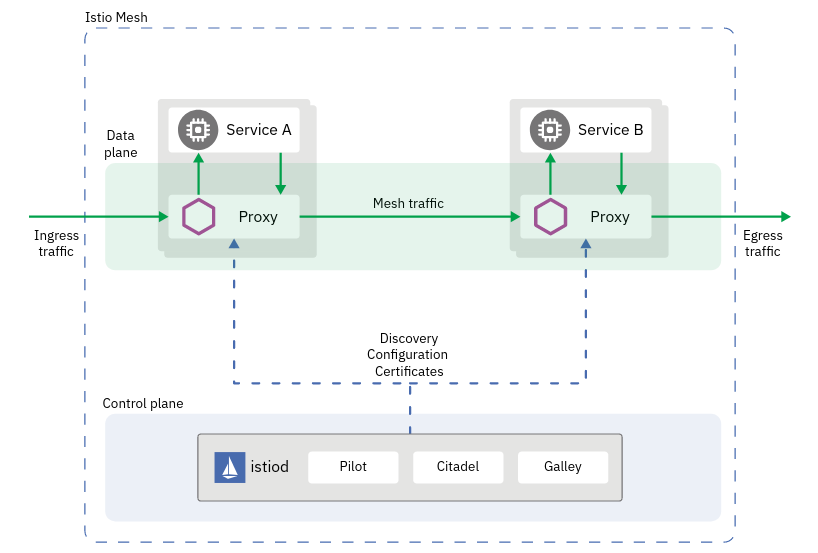 © istio.io
To route traffic (e.g. REST API calls) into a Kubernetes application normally requires a Kubernetes Ingress. With Istio, the equivalent is a Istio Gateway which allows it to manage and monitor incoming traffic. This gateway in turn uses the Istio ingressgateway which is a pod running in Kubernetes. This is the definition of an Istio gateway:
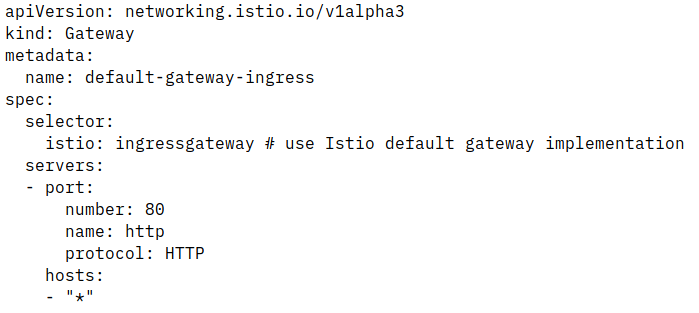
This gateway listens on port 80 and answers to any request (“*”). The “hosts: *” should not be used in production, of course. For a Minikube test environment it is OK.
The second required Istio configuration object is a “Virtual Service” which overlays the Kubernetes service definition. The Web-API service in the example exposes 3 REST URIs. Two of them are used for API documentation (Swagger), they are /openapi and /openapi/ui/ and are currently independent of the version of Web-API. The third URI is /web-api/v1/getmultiple and this is version-specific. This is the VirtualService definition:
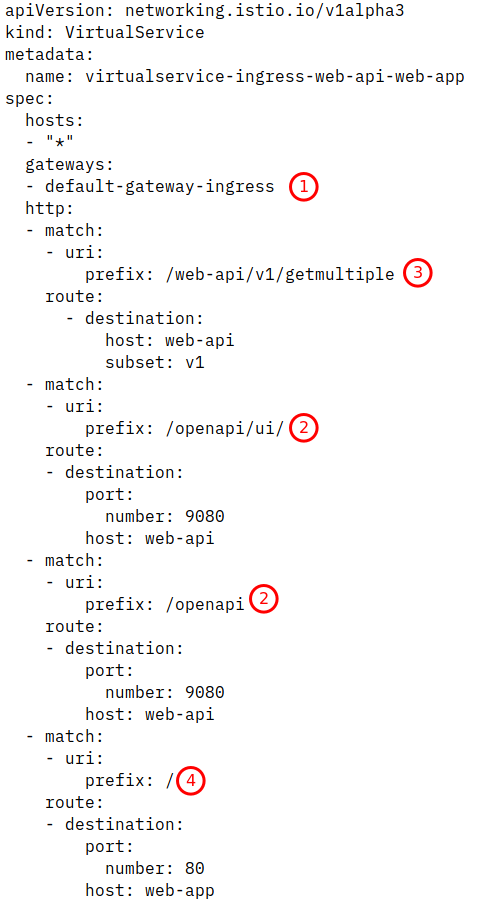
- is the pointer to the Ingress Gateway
- are URIs that directly point to the Kubernetes service web-api listenting on port 9080 (without Istio)
- is a URI that uses “subset: v1” of the service web-api which we haven’t defined yet, this is Istio specific
- the root / is pointing to port 80 of the web-app service which is different from web-api! It is the service that provides the Vue app to the browser.
The last object required is a DestinationRule, also Istio specific:
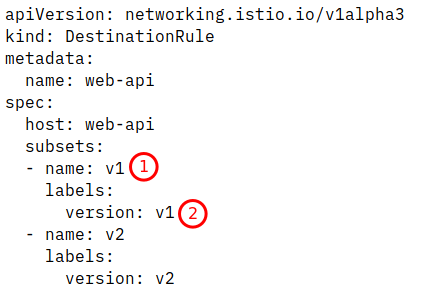
Here the subset v1 is selecting pods that belong to web-api and have a selector label of “version: v1” which is the deployment “web-api-v1”.
With this Istio rule set in place all incoming traffic will go to version 1 of the Web-API.
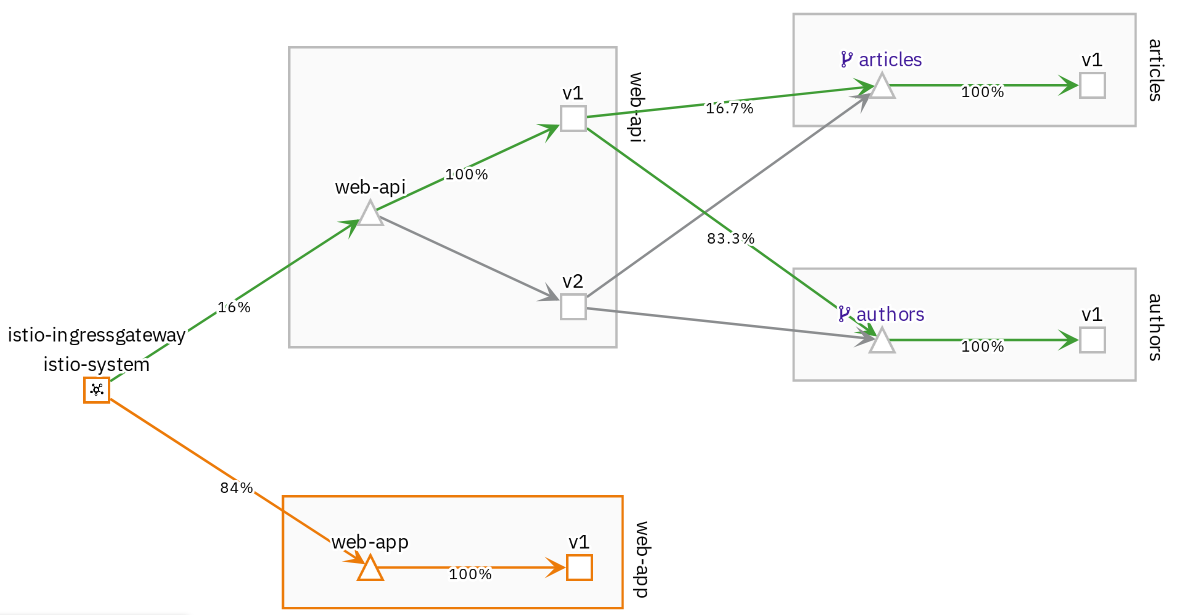
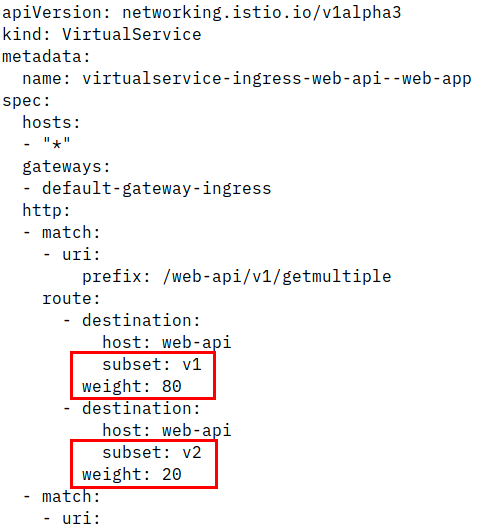
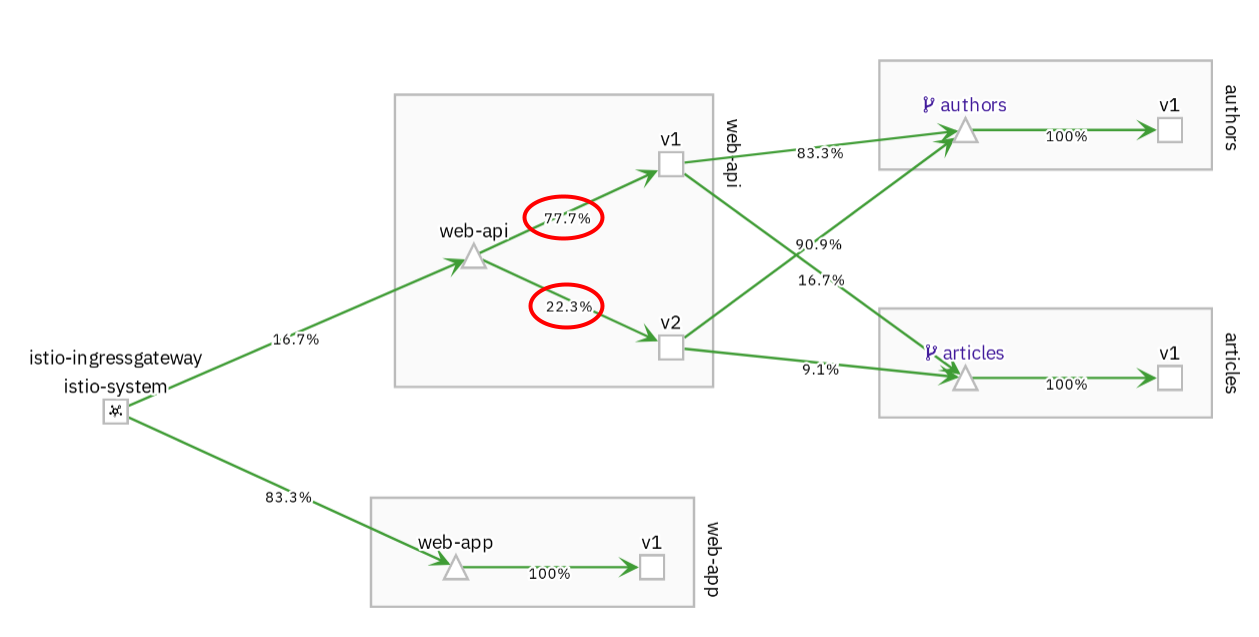
We can change the VirtualService to distribute incoming traffic, e.g. 80% should go to version 1, 20% should go to version 2:
And this is how it looks in Kiali:
I will continue to experiment with other Istio features like telemetry (monitoring, logging), fault injection, etc. I feel like “Jugend forscht” :-)